Report Hub – Quick User Guide
Feb 20, 2026
Create, run, share, and schedule reports from your channel data in minutes.
What is Report Hub?
Report Hub helps you generate reports from your organization’s channel data—instantly.
Use it for daily briefs, client updates, team status, escalations, overdue items, and more.
Run a report anytime, download it as a PDF, share it on email, or schedule it to arrive automatically.
1) Open Report Hub (Home)
Open "Report Hub" from the left sidebar.
On the Home page, click "+ New Report" to create a report.
Use the filters to switch between "All Reports", "Public templates", and "Custom Reports".
Figure 1. Report Hub Home page (Create new reports + view saved reports).
2) Understand Report Cards
Each card is a saved report you (or your organization) can reuse anytime.
Click "Quick Run" to run a report instantly without editing.
Click the three dots (⋯) to Duplicate, Edit, or Delete.
Figure 2. Card menu options: Duplicate, Edit, Delete.
3) Create a New Report
Click "+ New Report".
Enter a "Report Title" (example: Morning Brief).
Choose "Visibility": Private (only you) or Org Wide (visible to your organization).
Choose "Report Context" to select which groups/categories the report should use.
Optional: turn on the toggle "Use different context for each section" if each section should use different groups.
Figure 3. New Report screen (Title, Visibility, and Report Context).
4) Add Sections to Your Report
A report is made of sections. Add at least one section.
Give each section a clear "Section Title" (example: Team Performance).
Choose one section type:
Custom: write your own instructions (prompt).
Template: pick a ready-made template provided by the Chetto team.
Impact Events (Escalations, Overdue, negative sentiment, etc.)
Inside a section, click "Impact Events".
Open the dropdown and select the impact event(s) you want to include.
You can add multiple impact events in a single report.
Tip: You can drag sections to reorder them anytime.


Figure 4. Add a section (Custom prompt example).
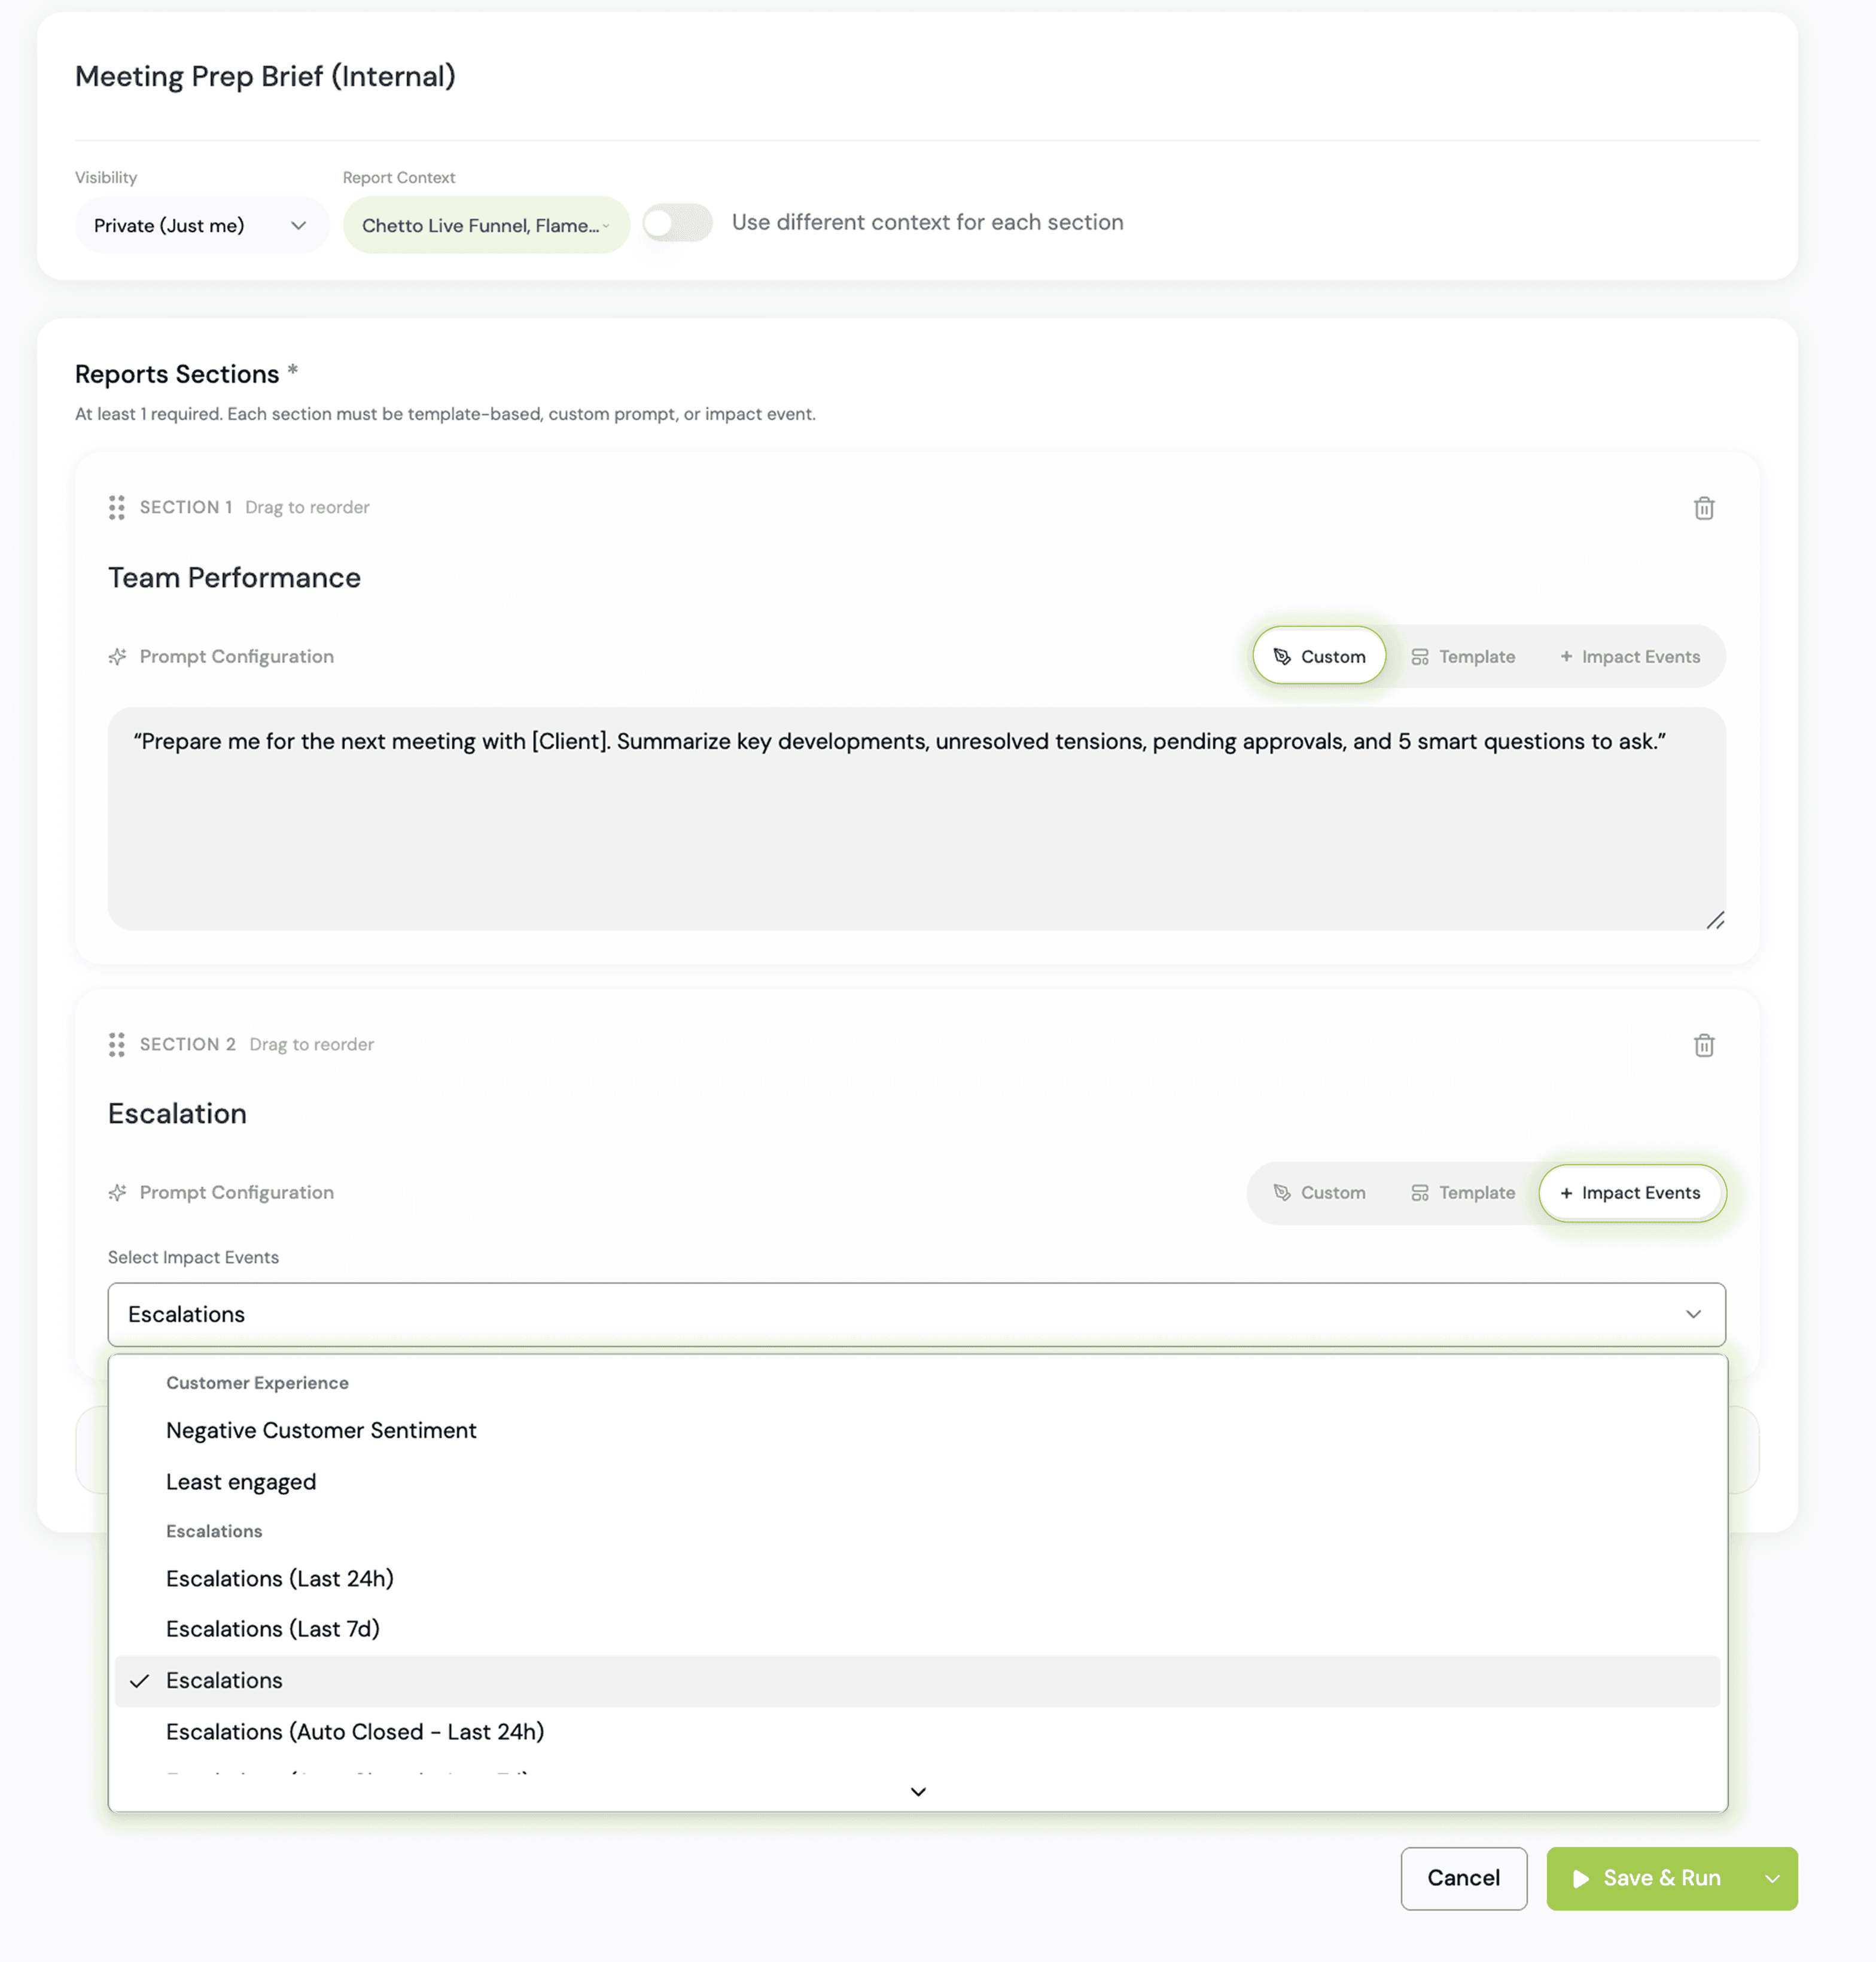
Figure 5. Select Impact Events from the dropdown.
5) Save & Run (or Schedule)
Click "Save & Run" to run the report immediately.
Click the arrow next to "Save & Run" for more options:
Save as Report: saves it for reuse later.
Schedule Run: sends it automatically on email at your chosen time.
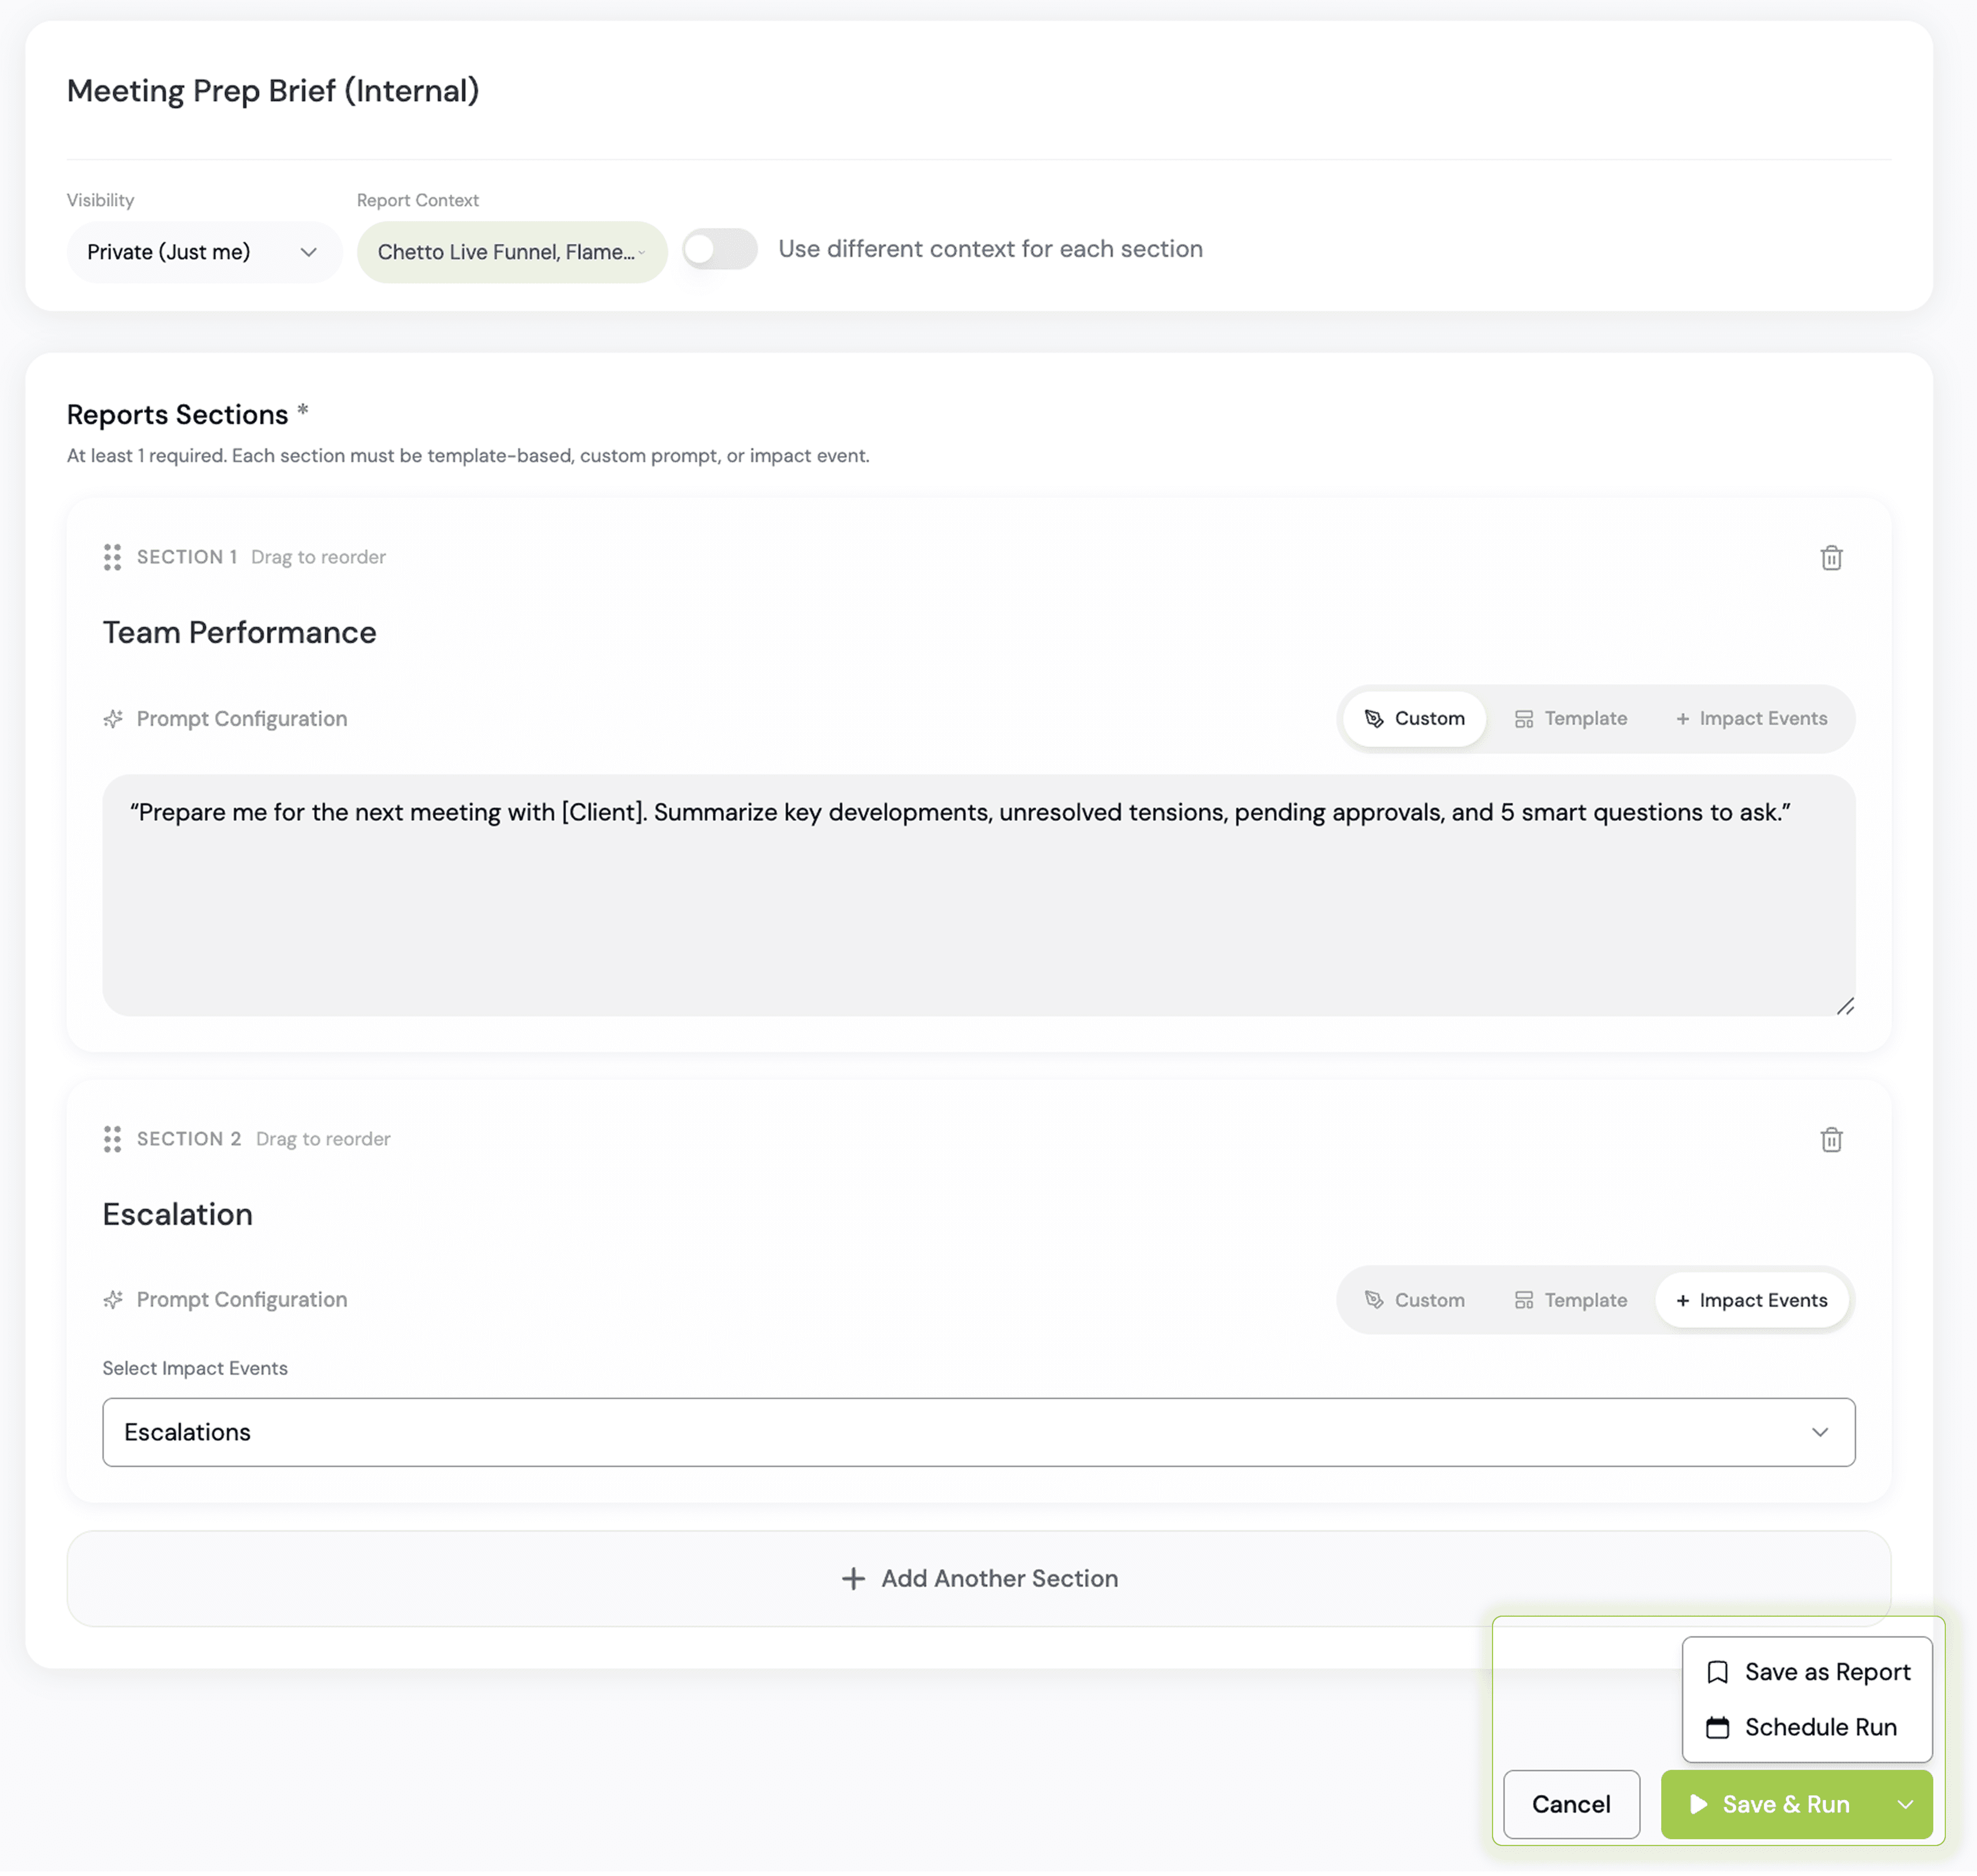
Figure 6. Save & Run dropdown (Save as Report / Schedule Run).
6) Schedule a Report to Email (New Feature)
Choose "Schedule Run".
Select "Frequency" (Daily / Weekly / Monthly).
Choose a "Time" for delivery.
Add one or more email addresses (comma-separated).
Click "Create Schedule".
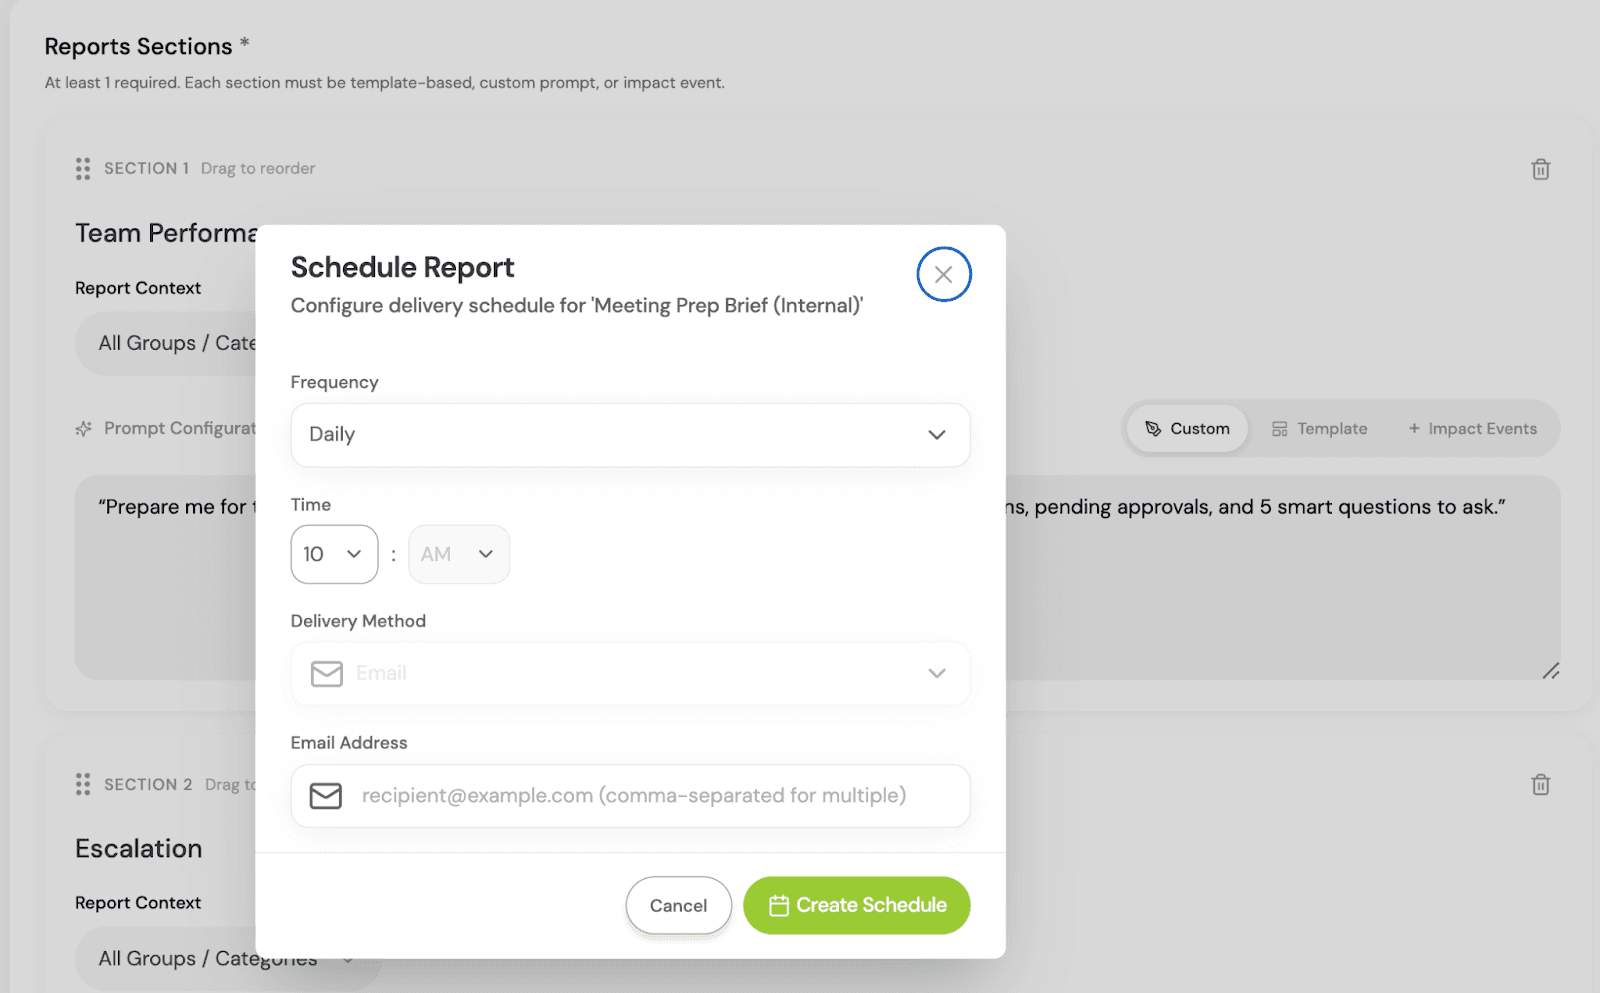
Figure 7. Schedule Report popup (Frequency, Time, Email recipients).
7) Quick Run a Report (Run without editing)
From any report card, click "Quick Run".
Select the "Report Context" for this run (this does not change your saved report).
Optional: tick "Customize context per section" to set different context per section.
Click "Run Report".
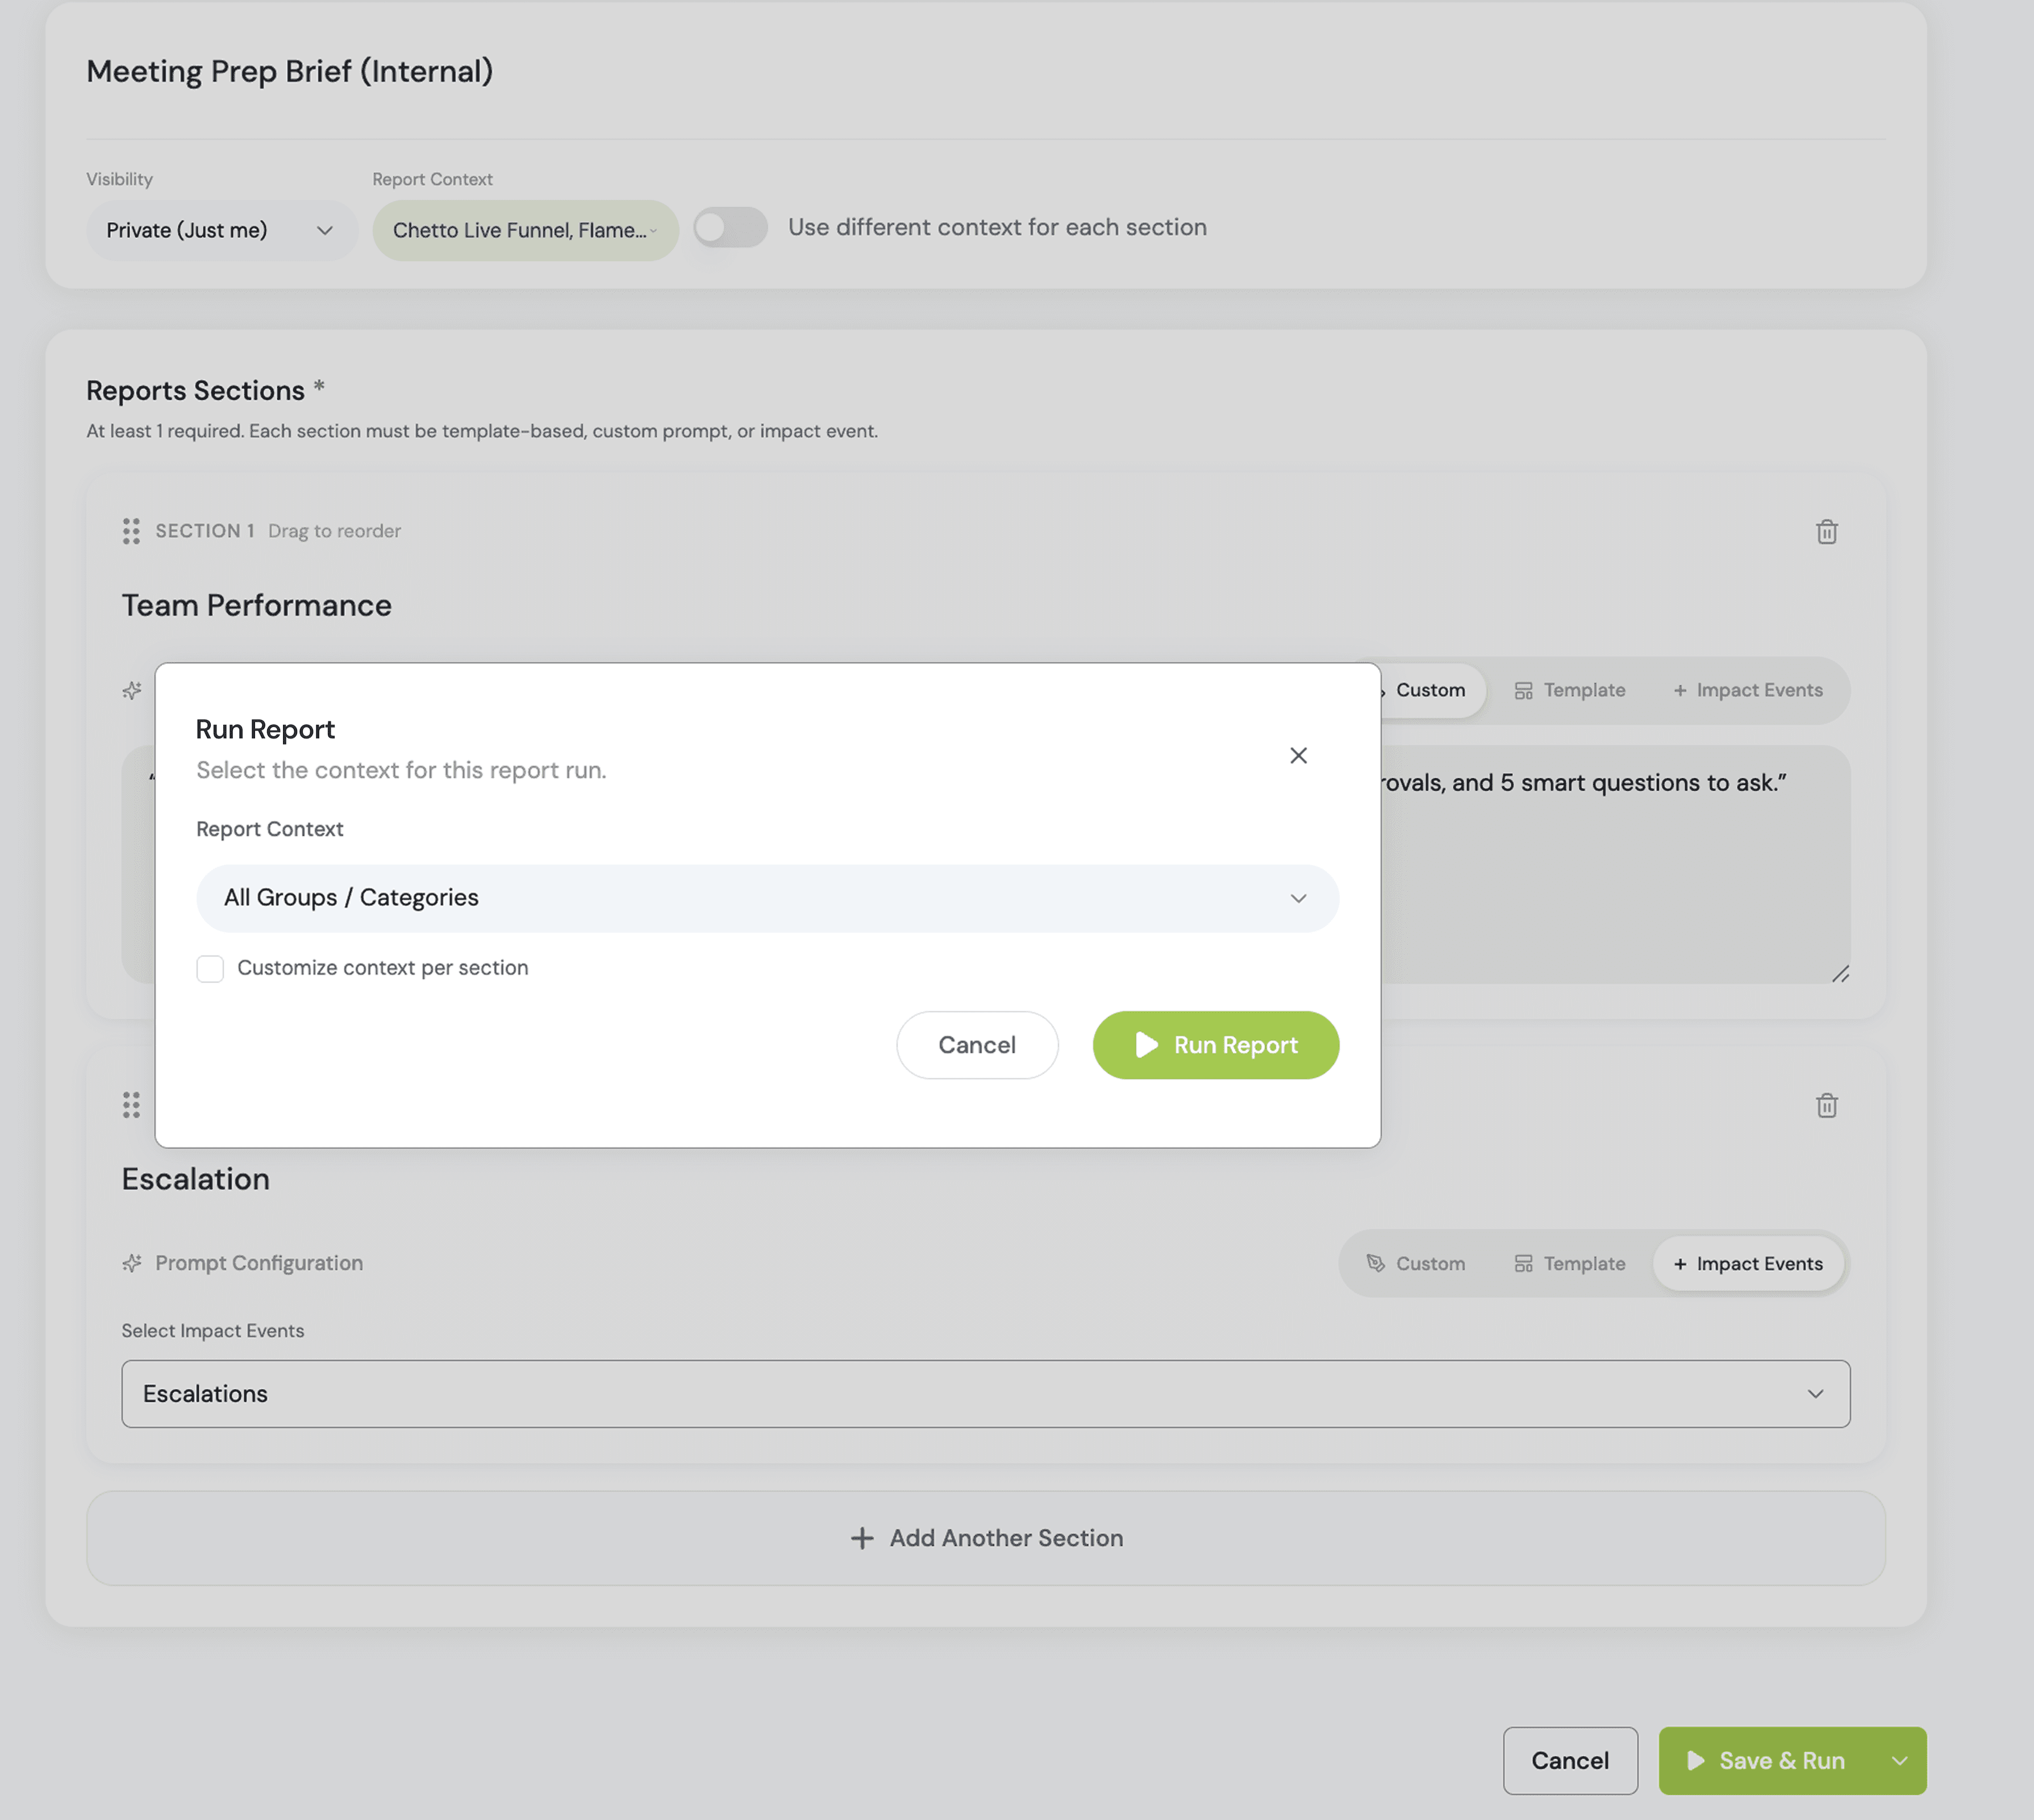
Figure 8. Quick Run popup (choose context, optionally customize per section).
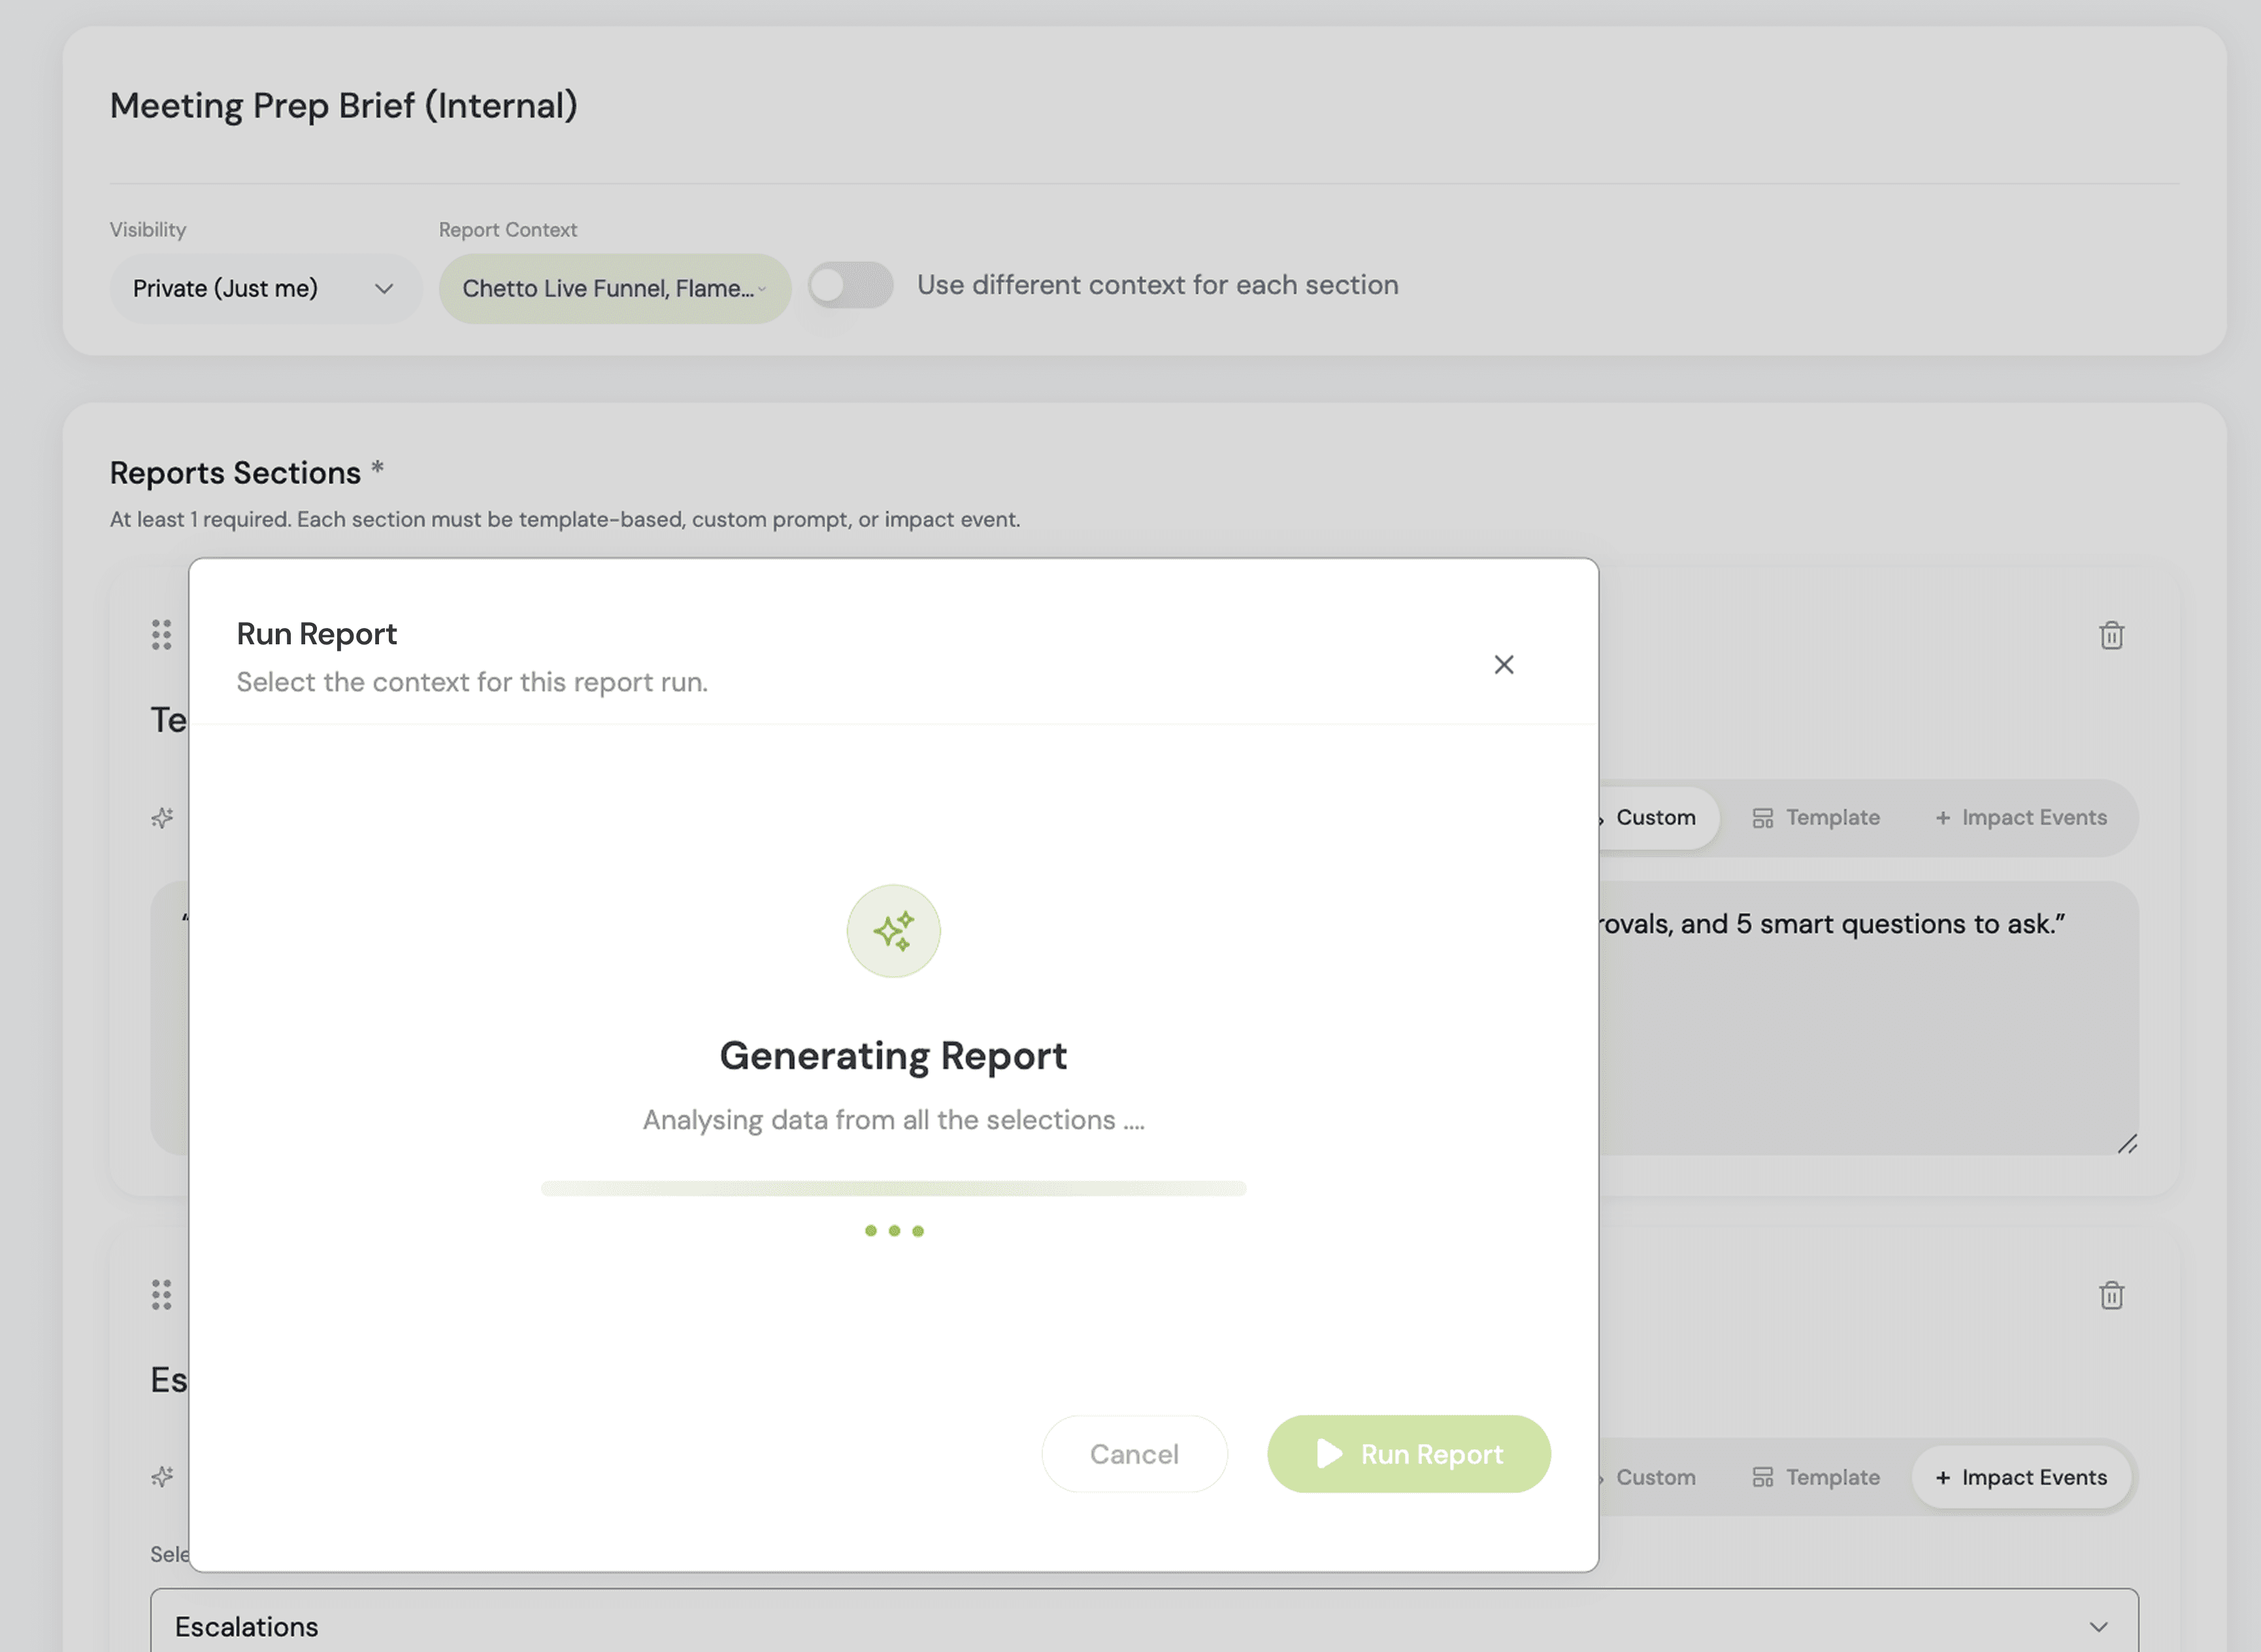
Figure 9. While running, you will see “Generating Report” until it completes.
8) Manage Scheduled Reports
Open the "Schedules" tab to see all scheduled reports.
Use Pause/Resume to stop or restart a schedule.
Use Edit to change frequency, time, or recipients.
Use Delete to remove a schedule.
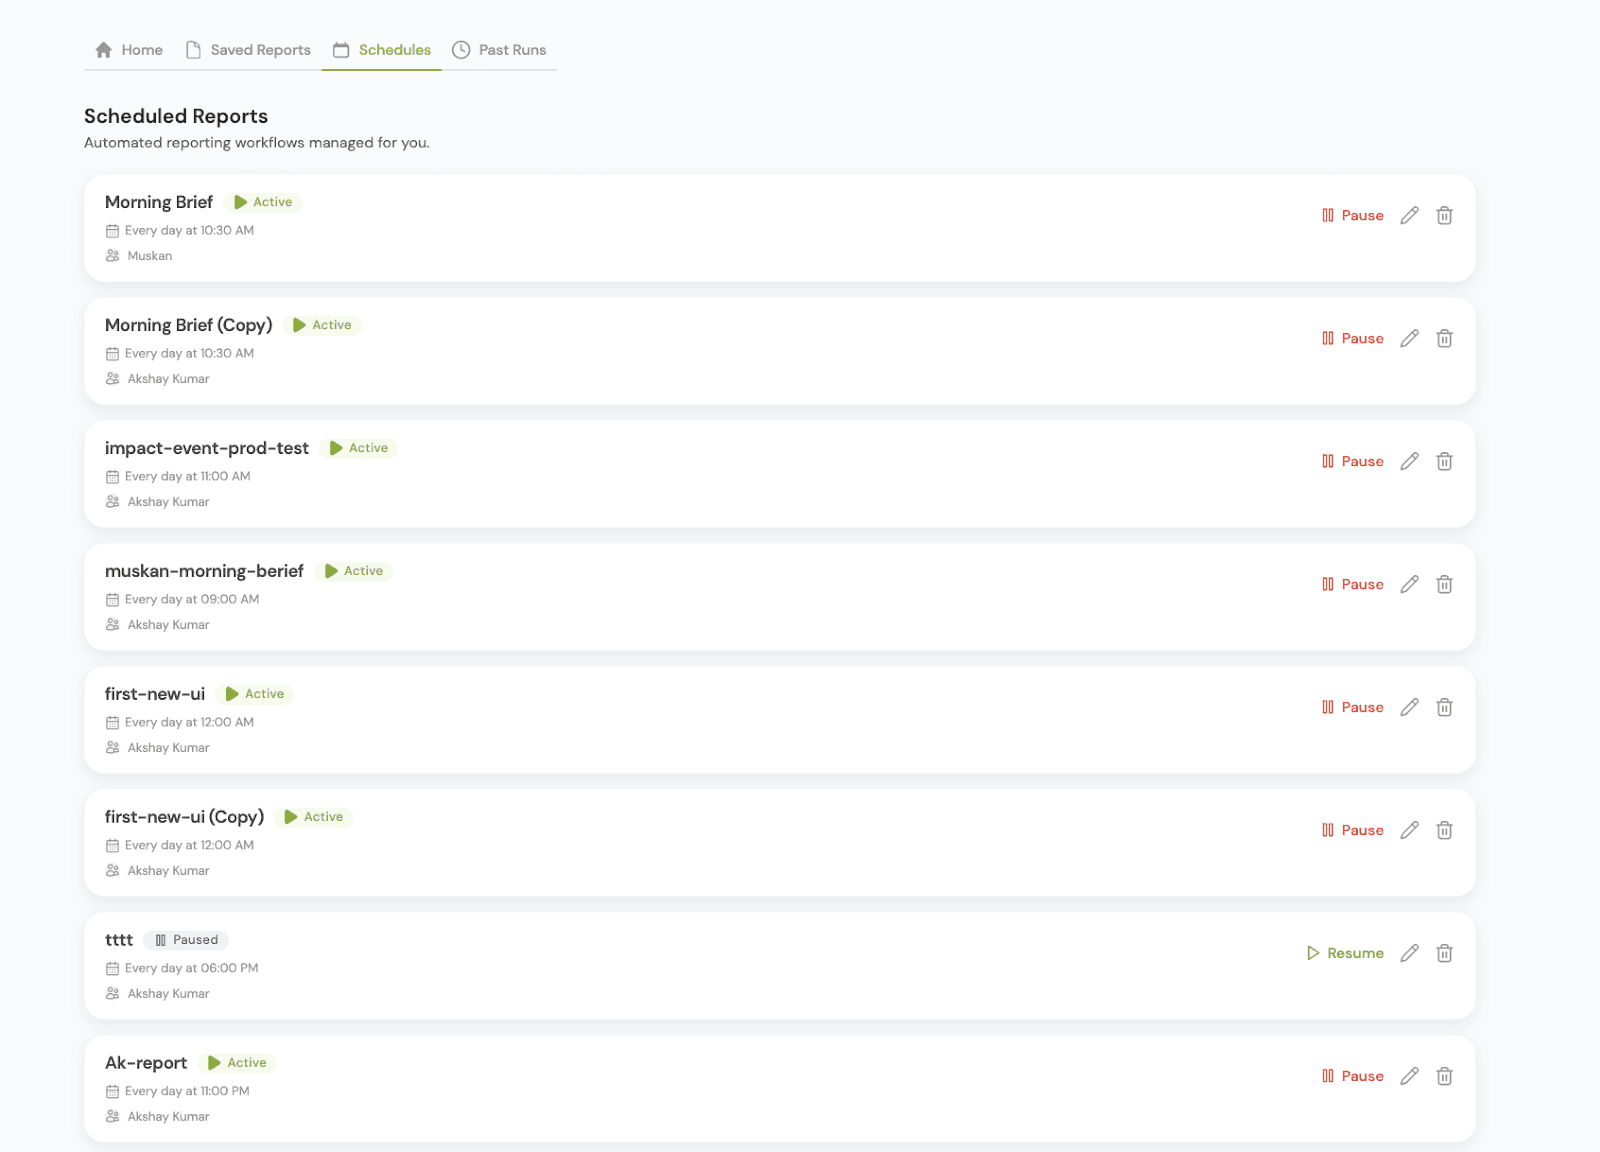
Figure 10. Schedules page (Pause, Edit, Delete).
9) View Past Runs
Open the "Past Runs" tab to see your previously generated reports.
Click "View" to open a report.
Click the download icon to download the PDF directly.
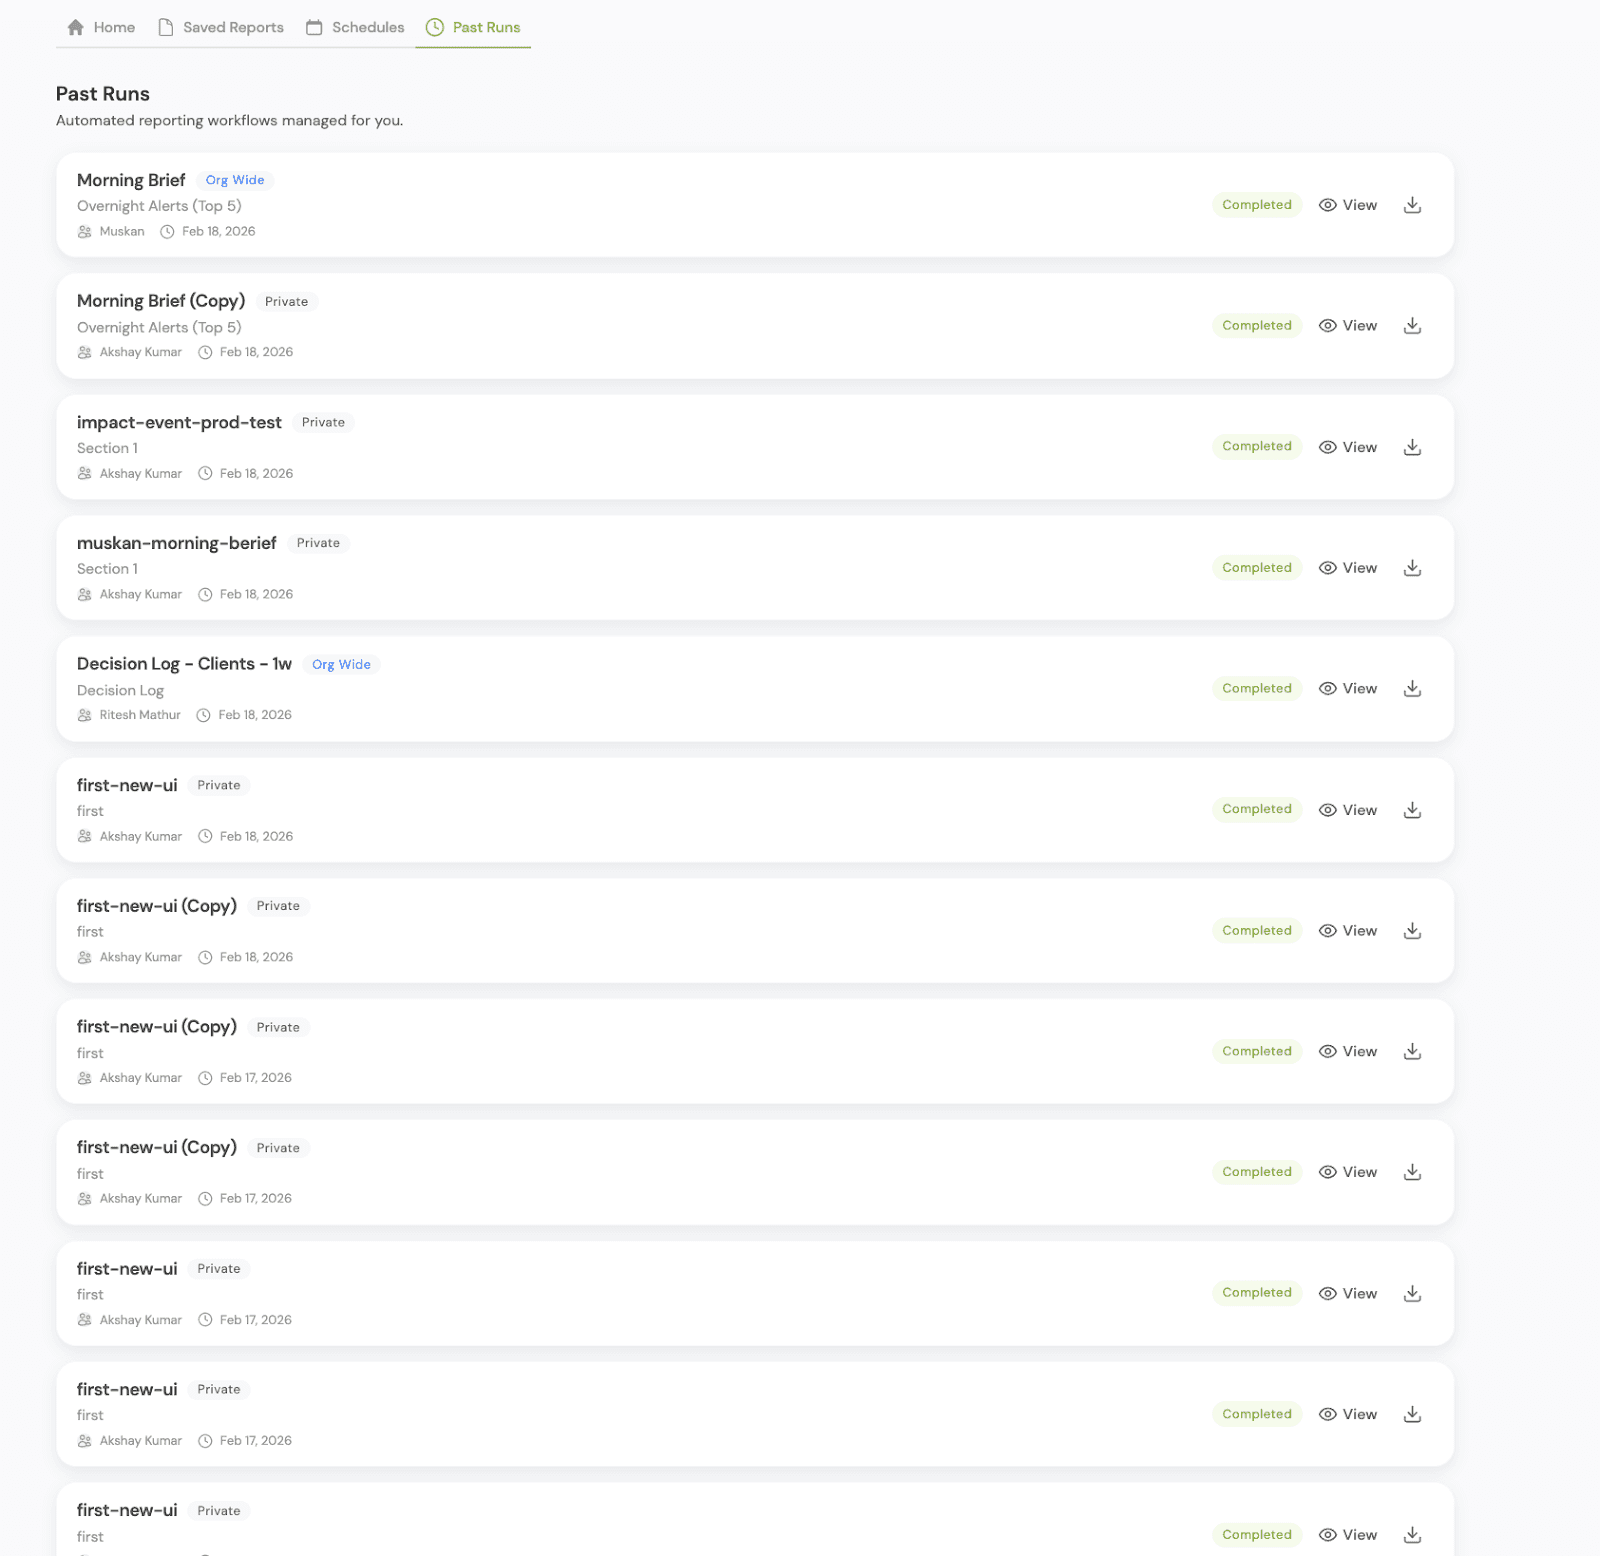
Figure 11. Past Runs page (View + Download).
10) Share or Download a Report
When a report opens, you can:
Download PDF
Back to Edit
Send Email
Schedule
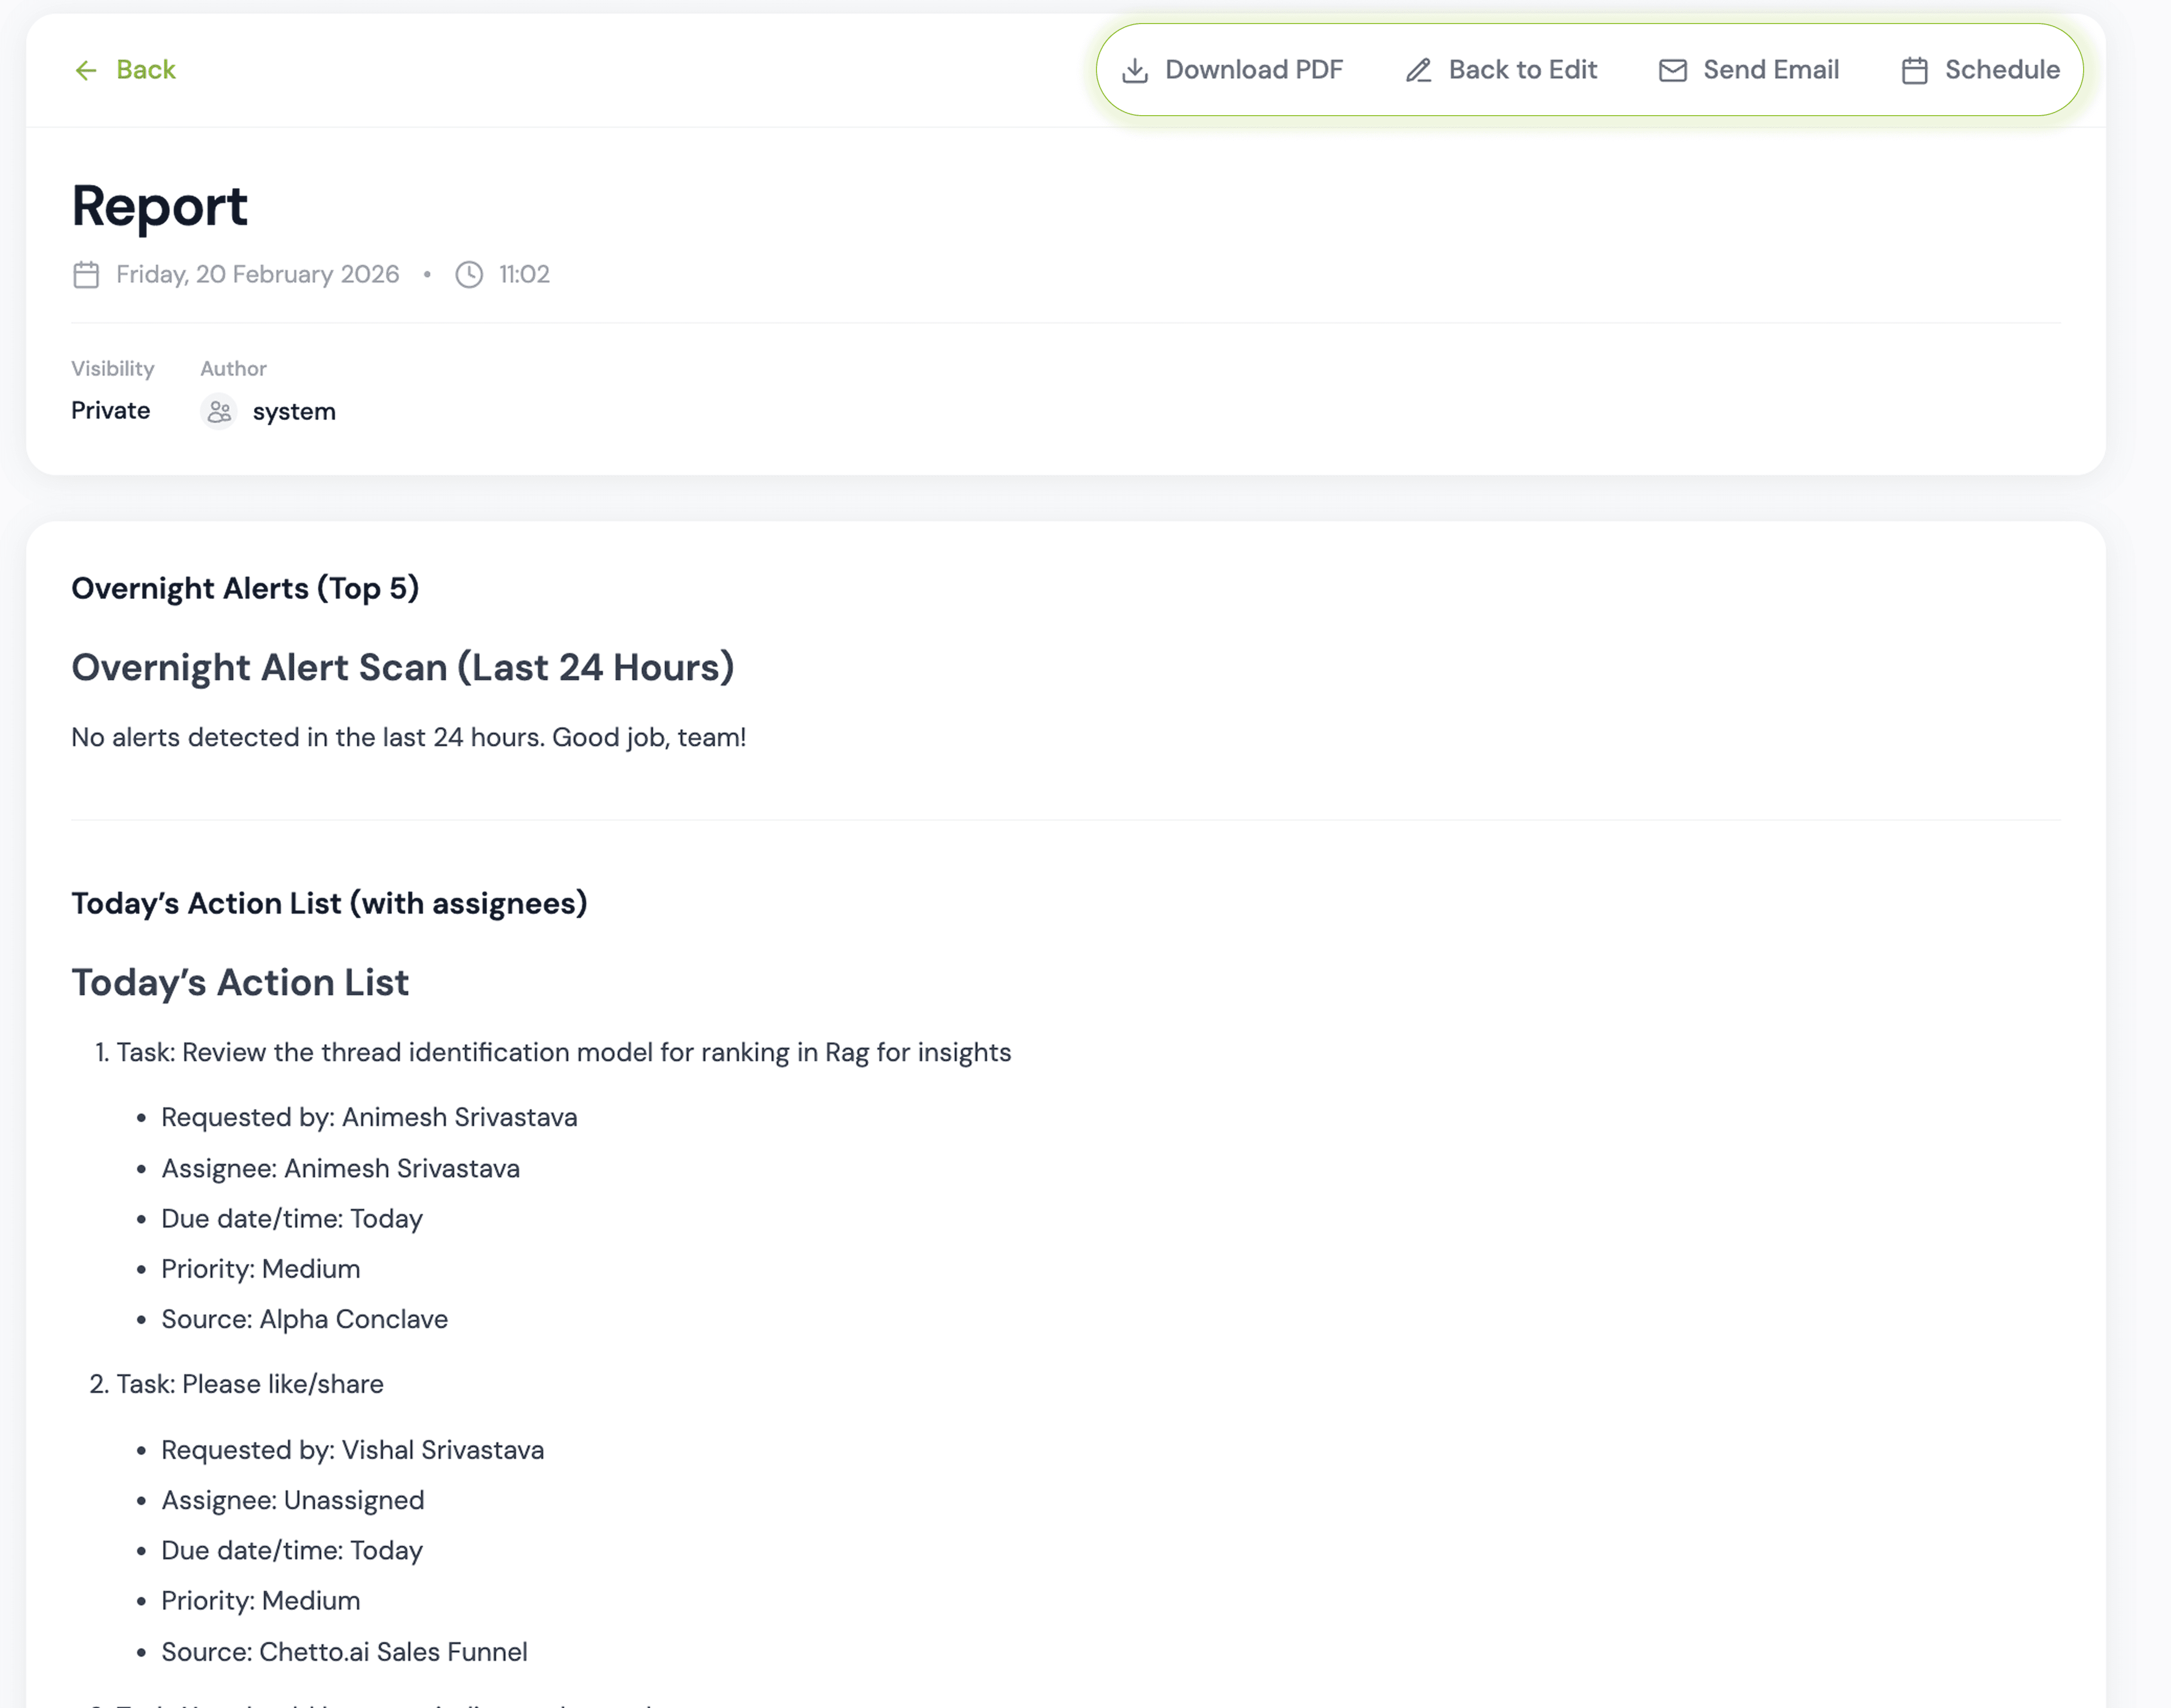
Figure 12. Report view actions: Download PDF, Back to Edit, Send Email, Schedule.
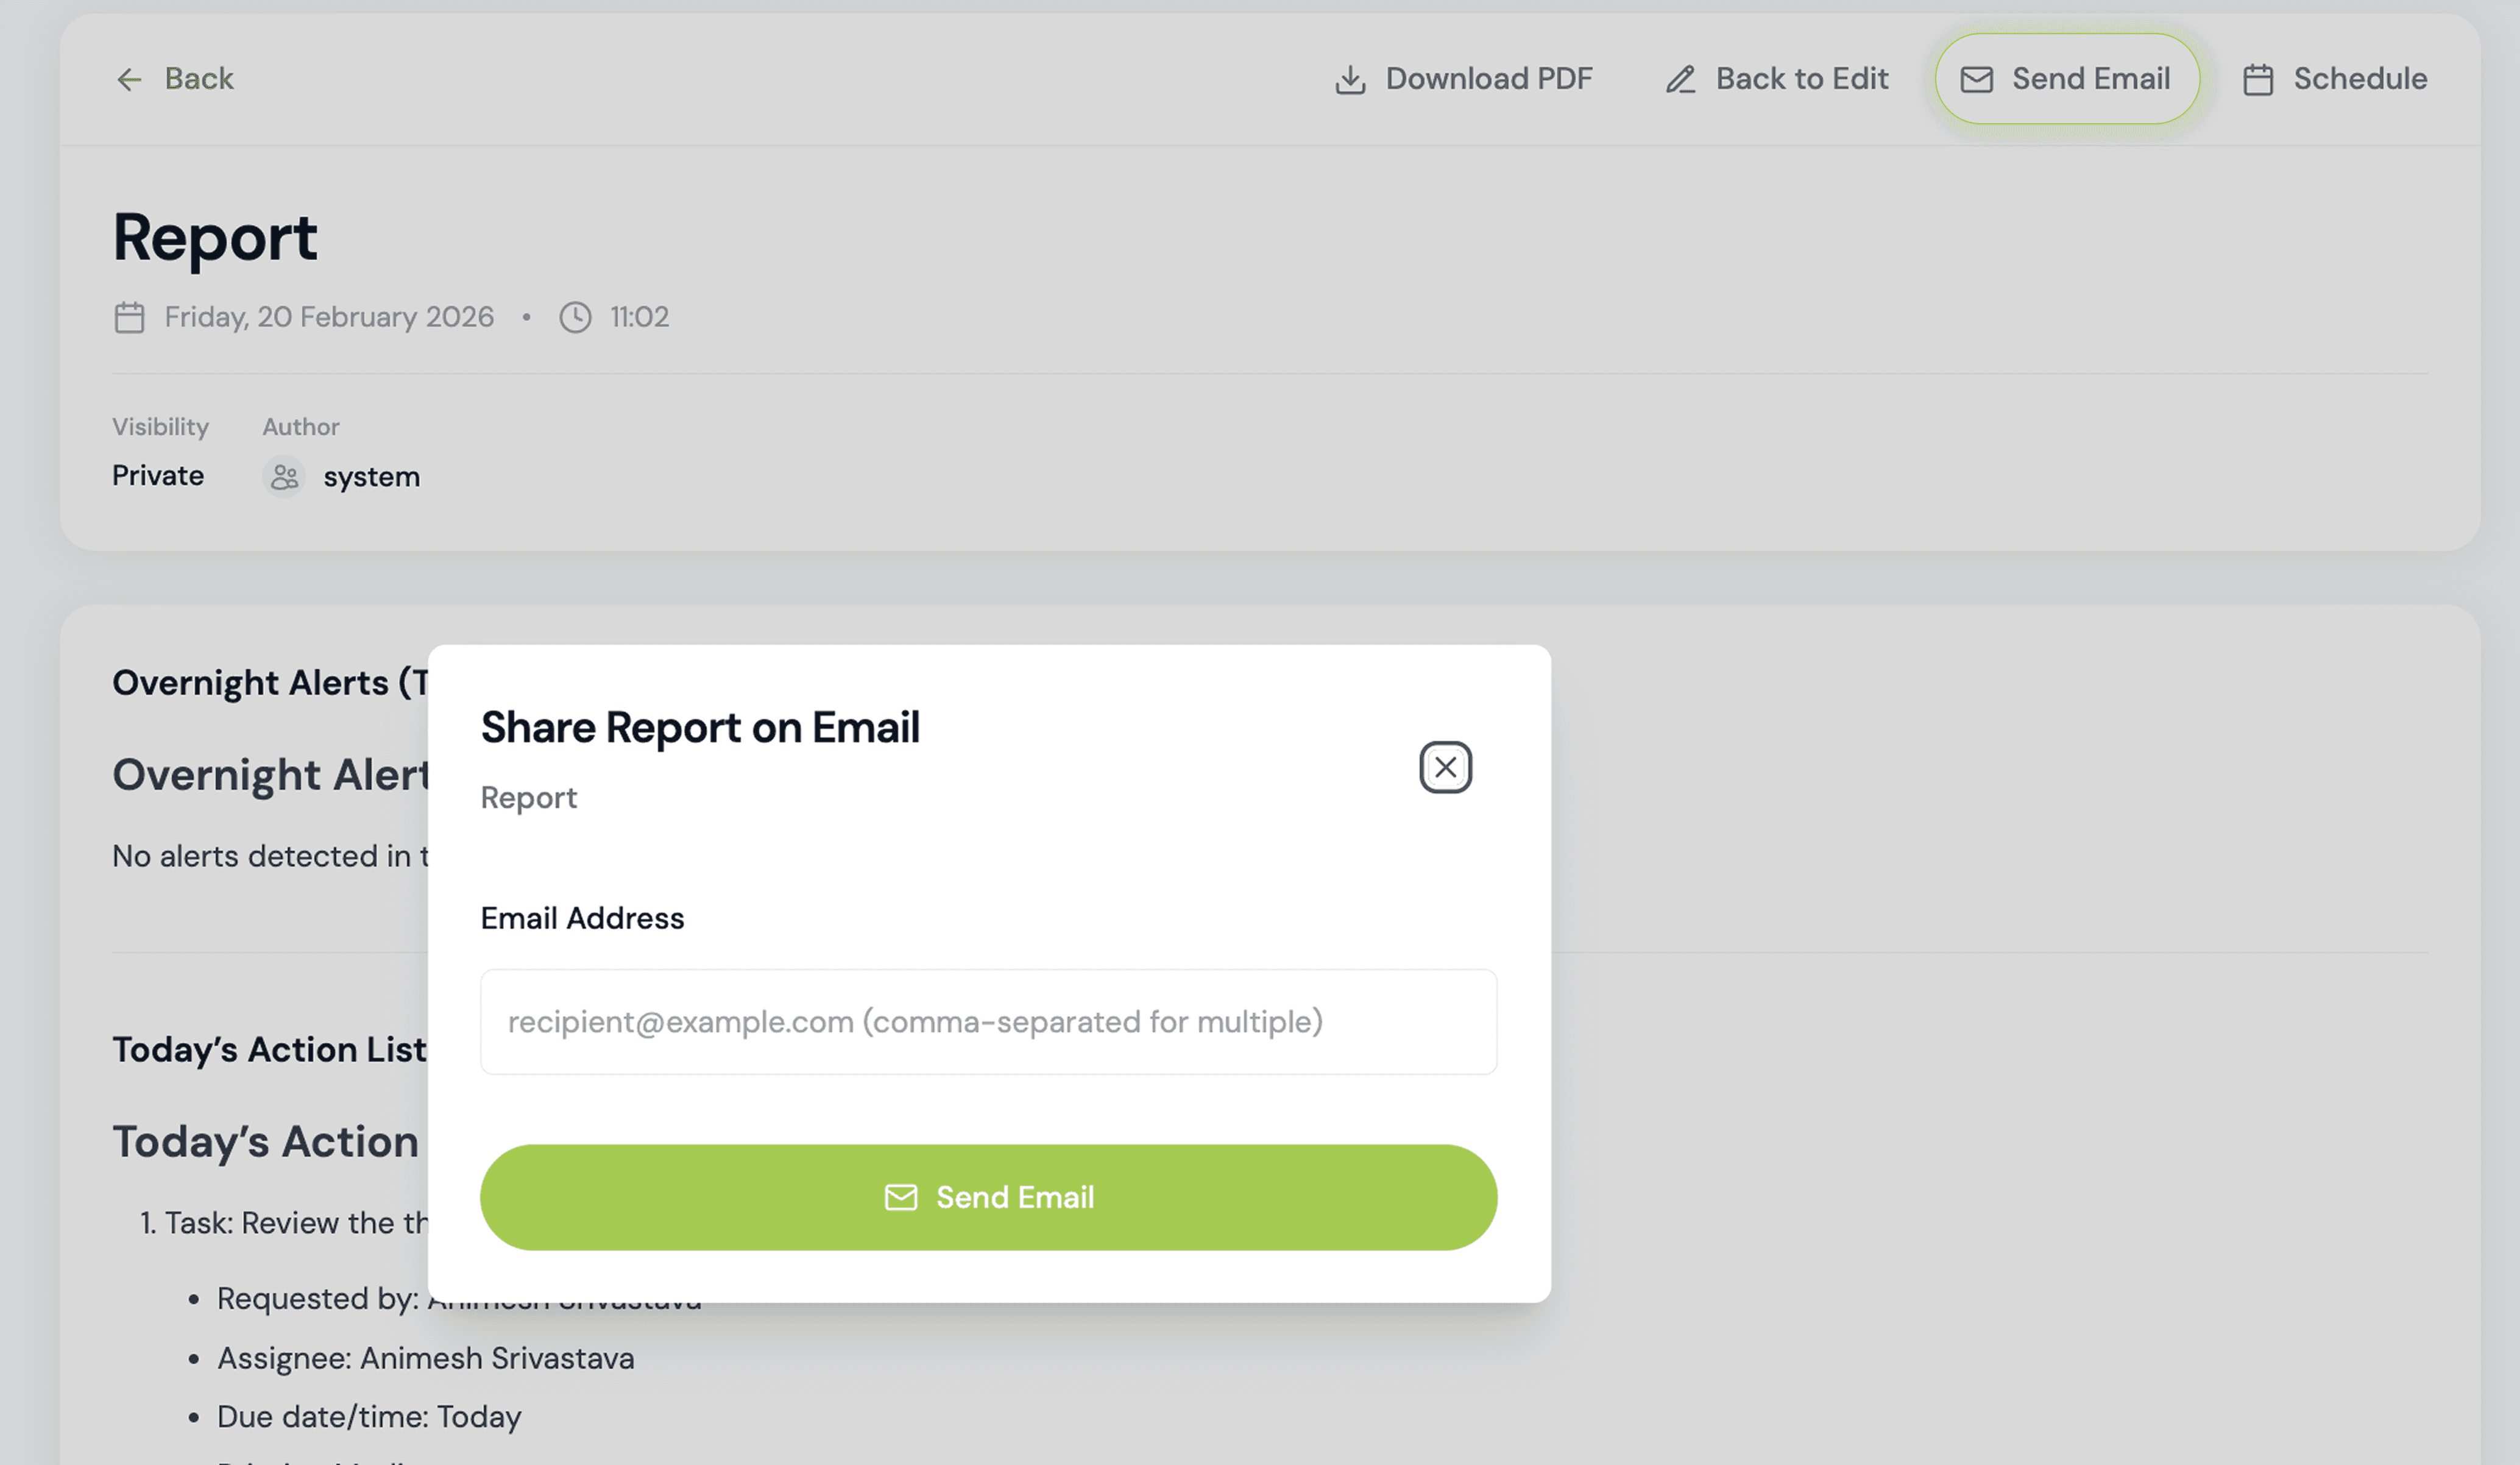
Figure 13. Share Report on Email popup (add recipients and Send).
Tips for better reports
Keep section titles short and clear.
In Custom prompts, say exactly what you want (example: “Summarize key updates, blockers, and next actions”).
Use Impact Events for quick, objective signals (escalations, overdue items, negative sentiment).
Schedule daily/weekly reports for routines like Morning Briefs or weekly client updates.